Related Links
Backup and Restore Couchbase Files to IDrive® e2
Couchbase is an open source, NoSQL distributed document database (JSON) with features of a relational DBMS: SQL, distributed ACID transactions, and more. Backup your Couchbase Server to IDrive® e2 hot cloud storage and restore your archives from IDrive® e2 to the Couchbase server.
Prerequisites
Before uploading or restoring files using IDrive® e2, you require:
- An active IDrive® e2 account. Sign up here if you do not have one.
- A bucket in IDrive® e2. See how to create a bucket.
- Valid Access Key ID and Secret Access Key. Learn how to create an access key.
Set up a daily backup to IDrive® e2 using the Couchbase Server web interface
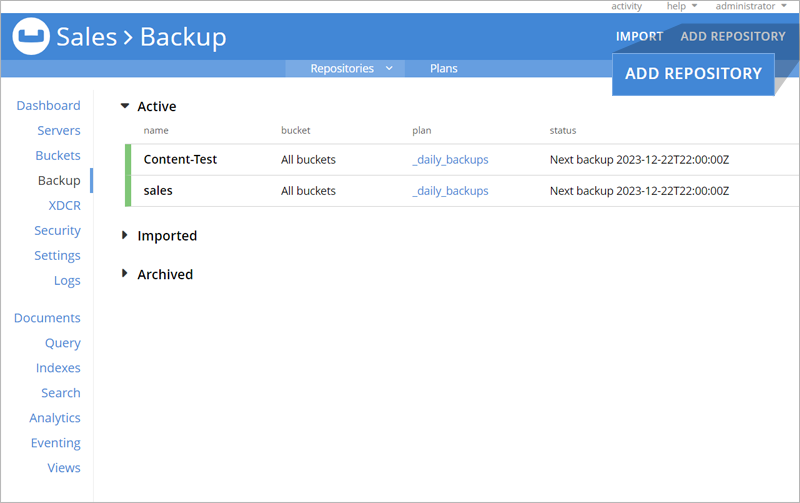
- Login to the Couchbase Server Dashboard.
- Go to the 'Backup' tab and click 'ADD REPOSITORY'.
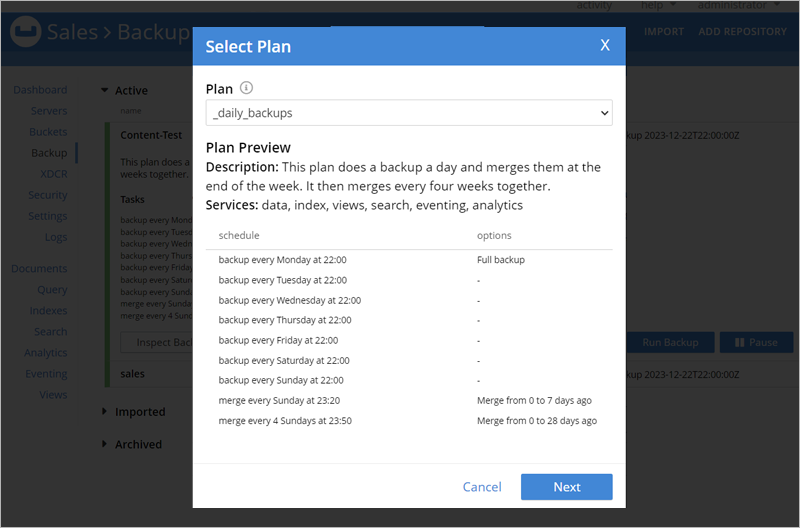
- In the 'Select Plan' popup, select '_daily_backups' and click 'Next'.
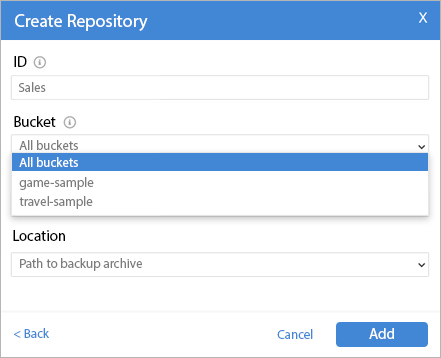
- In the 'Create Repository' popup enter the following information:
- ID - Enter a name for the repository that will be created in IDrive® e2 storage.
- Bucket - Select a particular bucket or all buckets in the Couchbase database for backup.
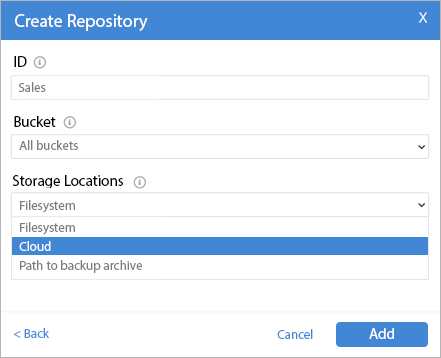
- Storage Locations - Select 'Cloud' as the location to save the backup.
- Staging Directory - Enter '/tmp/cb'.
- Provider - Select 'AWS' as the provider.
- Cloud Bucket - Enter the IDrive® e2 bucket name where you want to store the data.
- Path Prefix - Enter a prefix of your choice. A folder will be created with this name in the cloud bucket and the backups will be stored in the folder.
- Cloud Auth Type - Select authentication type as 'ID and key (0)'.
- Credential ID - Enter the Access Key ID from IDrive® e2.
- Credential Key - Enter the Secret Access key from IDrive® e2.
- Region - Enter NA.
- Advanced cloud options > Endpoint - Enter the region endpoint URL from IDrive® e2
- Click 'Add'. A daily backup job is now created.
- Click on the backup job and click 'Run Backup' to start the backup.
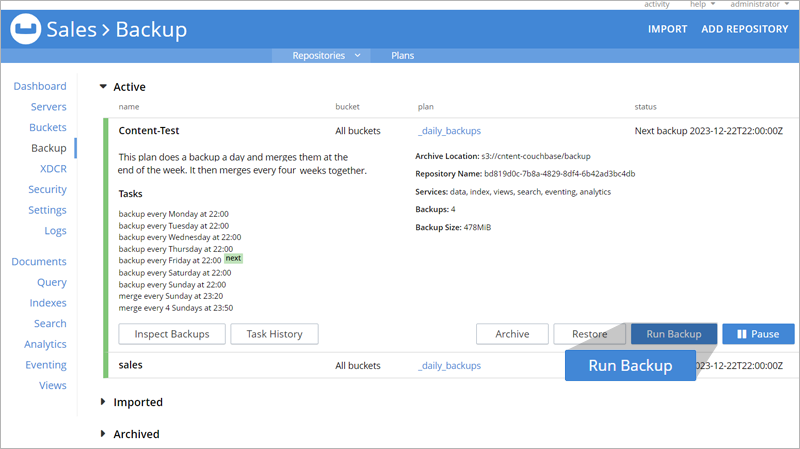
- Click 'Backup' in the 'Trigger Backup' popup.
- Once the backup is complete you can click on the backup job and view 'Task History' or 'Inspect Backups'.
Restore an archive from IDrive® e2 bucket using the Couchbase Server web interface
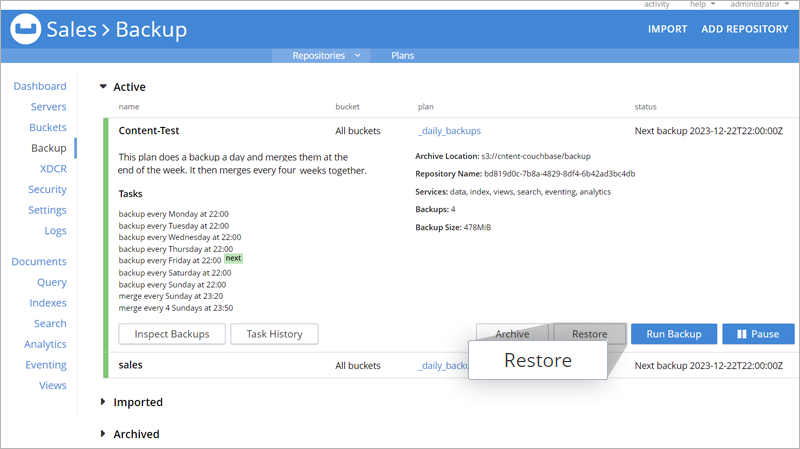
- Click on the required backup job and click 'Restore'.
- In the 'Restore Backups' popup, enter the following information:
- Cluster - Enter IP as the address of the cluster to restore the data. This is the target Couchbase server for restore.
- Auth Type - Select 'Plain'.
- User - Enter 'administrator'.
- Password - Enter a password to use in this restore.
- Start - Select the first backup to restore.
- End - Select the last backup to restore.
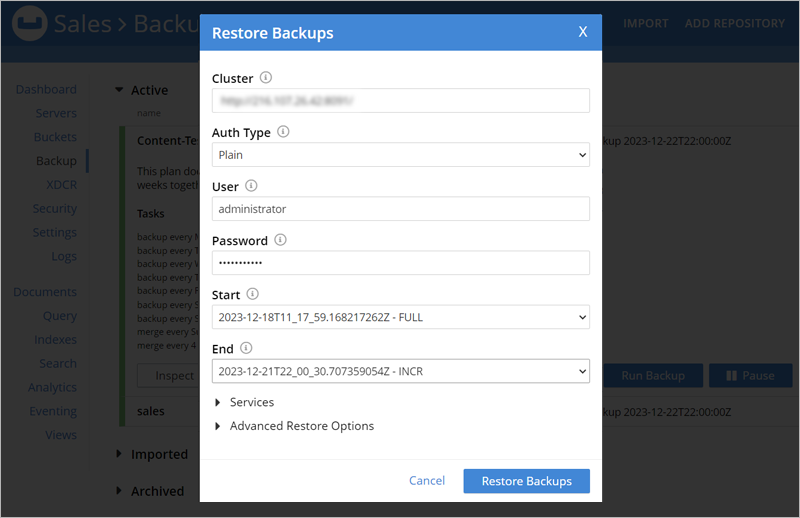
- Click 'Restore Backups'.
Backup using Couchbase Command Line Tools
- Before performing a backup, download and extract the Couchbase command line tools from here.
- Navigate to the bin directory.
- Configure the IDrive® e2 bucket for Couchbase backup using the following command:
./cbbackupmgr config -a s3://bucket-for-cb/backup -r sales --obj-staging-dir /tmp/cb --obj-region na --obj-endpoint p3c2.fra.idrivee2-16.com --obj-access-key-id 0ku1A10Ik3zAKIFJNs14 --obj-secret-access-key 5RwfOqZR8VQbpg1pJigBpY7PozozFHgqLPd1I397 - Run the following command to backup to IDrive® e2 bucket:
./cbbackupmgr backup -a s3://bucket-for-cb/backup -r sales
--obj-staging-dir /tmp/cb --obj-region na --obj-endpoint
p3c2.fra.idrivee2-16.com --obj-access-key-id 0ku1A10Ik3zAKIFJNs14
--obj-secret-access-key 5RwfOqZR8VQbpg1pJigBpY7PozozFHgqLPd1I397 -c
216.107.26.42 -u administrator -p 123456 --no-ssl-verify
Restore from IDrive® e2 using Couchbase Command Line Tools
To restore an archive from IDrive® e2, run the following command:
./cbbackupmgr restore -a s3://bucket-for-cb/backup -r sales
--obj-staging-dir /tmp/cb --obj-region na --obj-endpoint
p3c2.fra.idrivee2-16.com --obj-access-key-id 0ku1A10Ik3zAKIFJNs14
--obj-secret-access-key 5RwfOqZR8VQbpg1pJigBpY7PozozFHgqLPd1I397 -c
216.107.26.42 -u administrator -p 123456 --no-ssl-verify
Note: IDrive® e2 does not allow creating public buckets. Only public buckets created before 21st July, 2026 are available.