Integrate Plesk Server with IDrive® e2
Plesk Server is a web hosting control panel that simplifies website, domain, email, and database management through an intuitive interface. It supports both Linux and Windows servers, automating administrative tasks for efficient hosting operations. Integrating Plesk Server with IDrive® e2 adds a capable and scalable cloud object storage solution that facilitates systematic integration for secure, efficient, and cost-effective data backup and management.
Prerequisites
Before you begin, ensure the following:
- An active IDrive® e2 account. Sign up here if you do not have one.
- A bucket in IDrive® e2. See how to create a bucket.
- Valid Access Key ID and Secret Access Key. Learn how to create an access key.
- Active Plesk Account.
- Plesk Obsidian v. 18.0.52.
The following steps can help you successfully integrate Plesk Server with IDrive® e2 cloud object storage.
Configure Plesk Server with IDrive® e2
- Install and open Plesk Server.
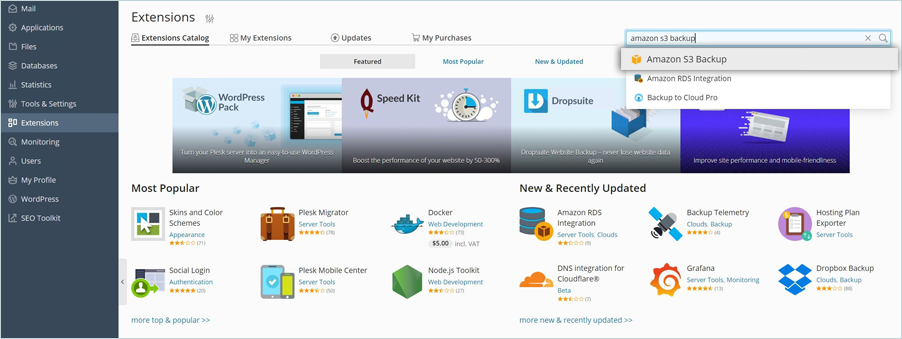
- Click Extensions in the left-side panel, and then type Amazon S3 Backup in the search box. Click on the extension.
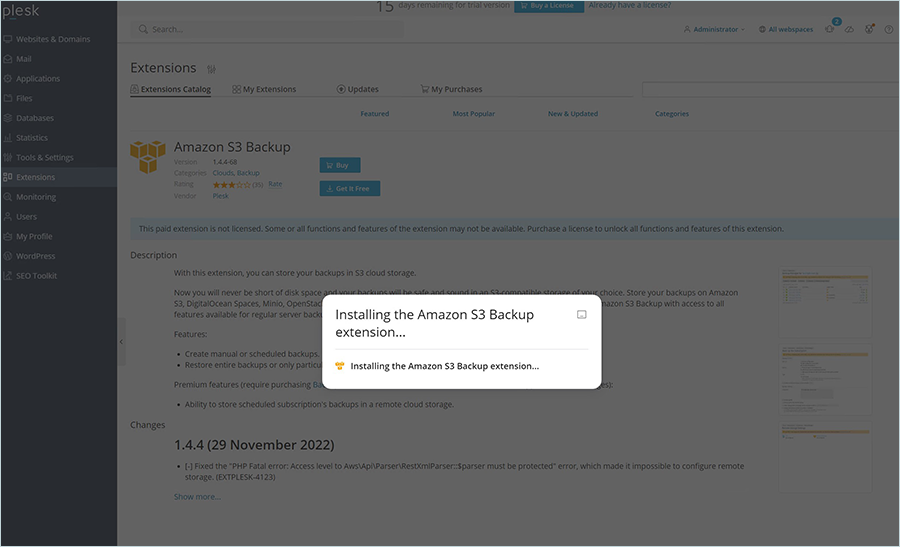
- Click Download for Free and install the extension.
- Click Tools & Settings in the left-hand pane and then click Backup Manager.

- In Backup Manager, click Remote Storage Settings.

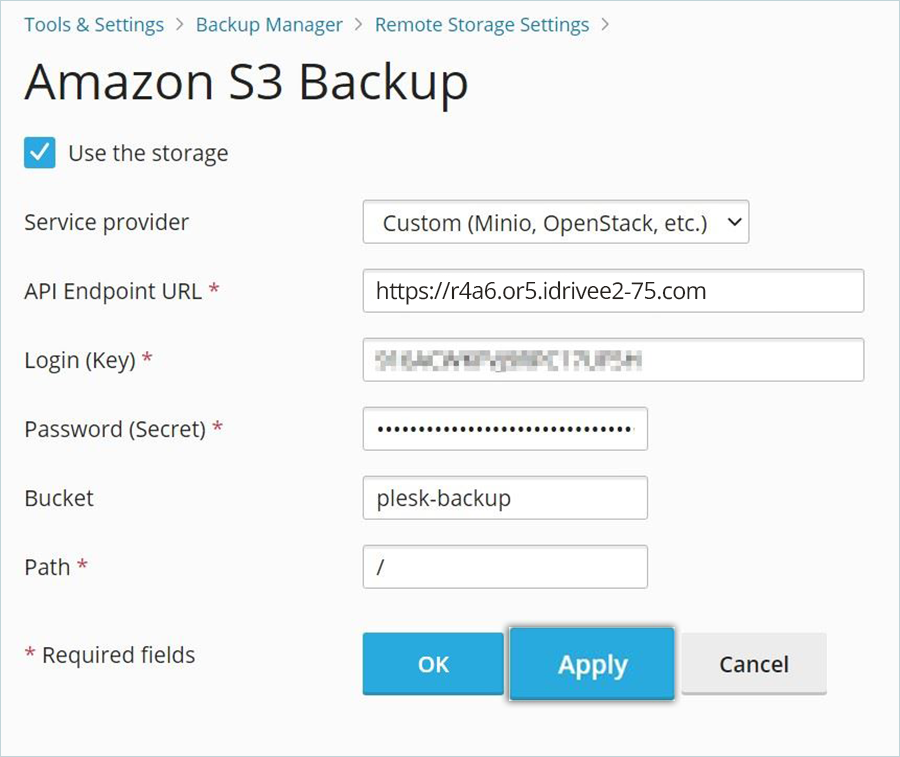
- Click Amazon S3 Backup.

- Select Custom in the Service provider dropdown under Amazon S3 Backup.

- Enter your IDrive® e2 details as mentioned below.
- Enter your IDrive® e2 S3 endpoint as API Endpoint URL.
- Enter your IDrive® e2 Access Key as the Login (Key).
- Enter your IDrive® e2 Secret Key as Password (Secret).
- Enter your IDrive® e2 Bucket as Bucket.
- Enter the folder name inside the bucket as Path.
- Click Apply and then click OK.
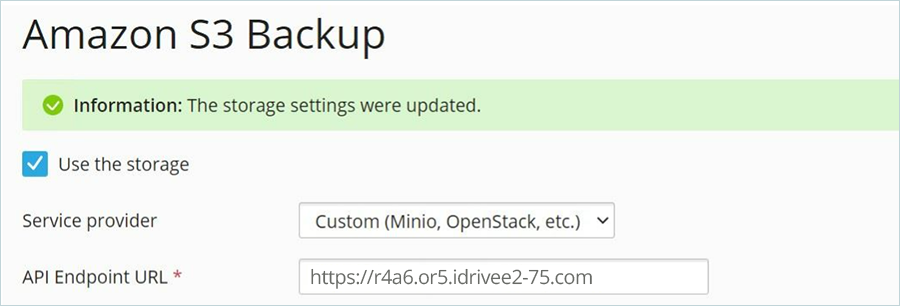
Your e2 cloud is now validated and added successfully.
Create Backup
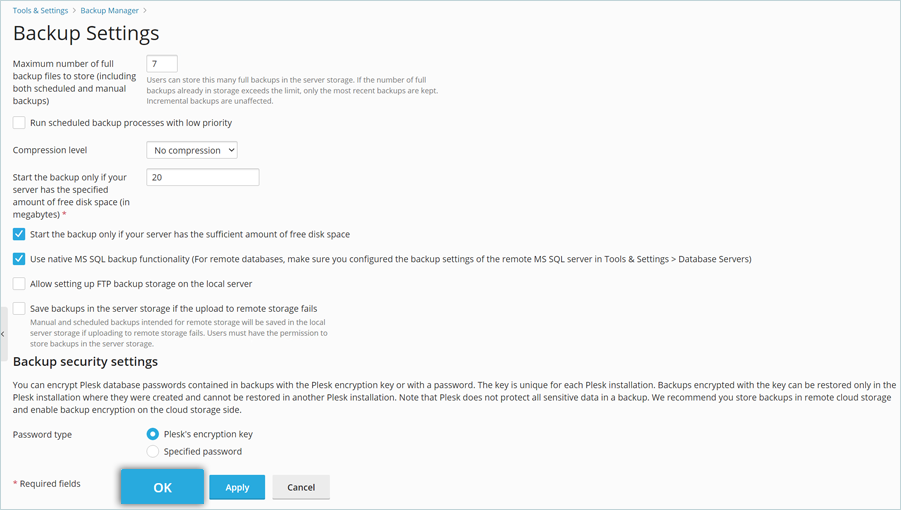
- Navigate to Backup Manager, then click Settings to add a backup.

- In Backup Settings,
- Enter the Maximum number of full backups.
- Select and set the Compression level as required.
- Select Password type and set (Plesk's encryption key is recommended).
- Click Apply and then OK.
- In Backup Manager, click Back Up in the header menu.

- Select what you want to back up from the Backup Server.
- Select Custom as Store In (Make sure to select Custom to specify the backup to go to your specified IDrive® e2 bucket).
- Click OK.
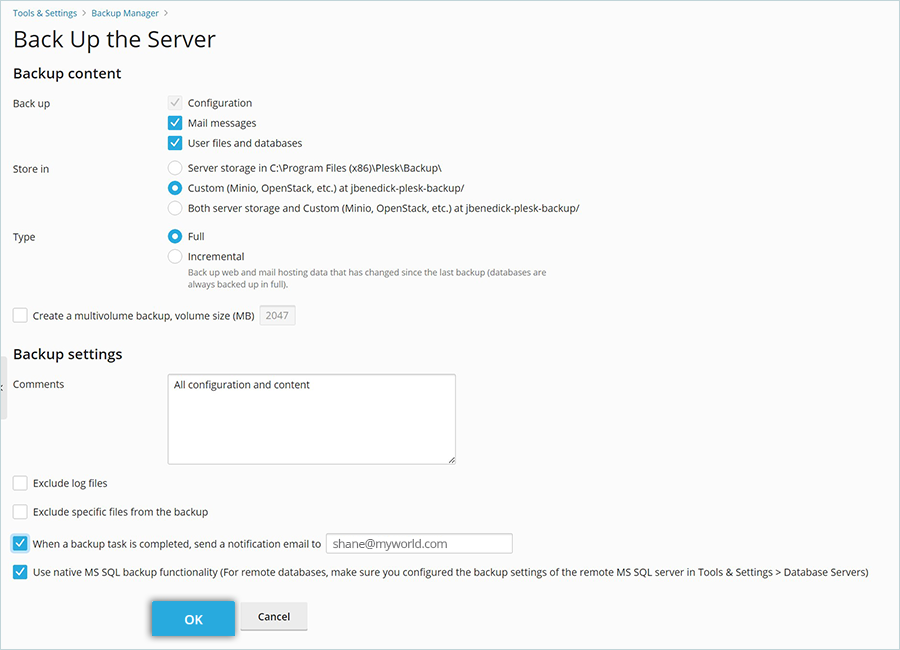
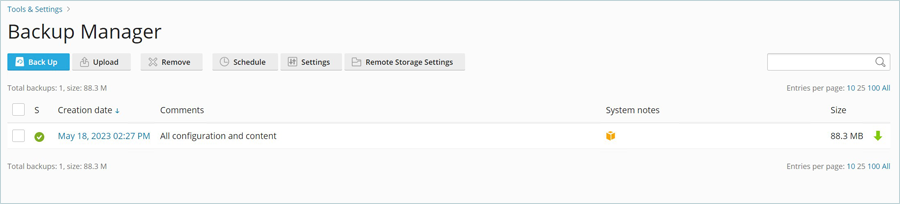
- The job will now start, and upon successful completion, it will return with a Green check mark and inform you of the backup size.
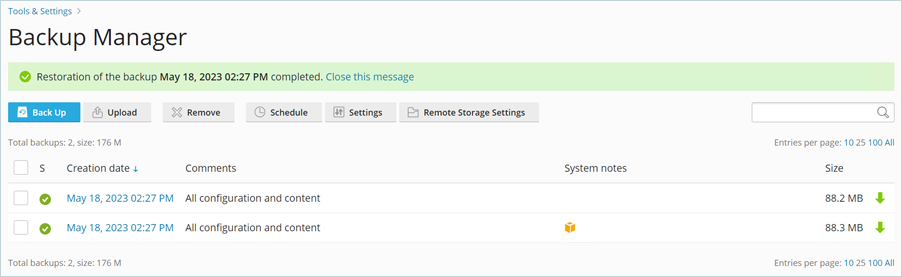
Restore Backup
- In Backup Manager, click the completed Creation date of the specified job that you wish to restore from.

- From here, you can select what you want to restore, either particular objects or all objects. Once you have made your selections, click Restore.
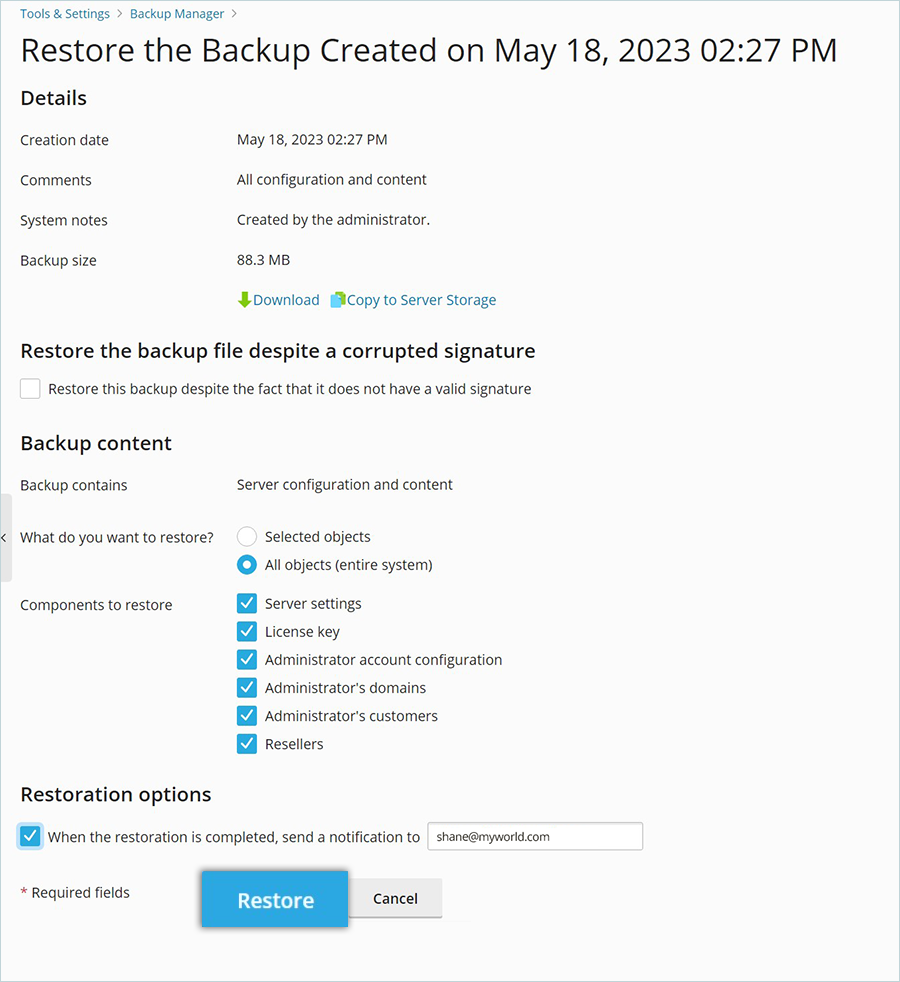
- You will see the job complete successfully when it is finished restoring in your Backup Manager.
Note: Data restoration is handled by your specific backup solution provider and is affected by multiple variables that are unique to your environment. For application-related enquiries/support, it is strongly recommended you seek guidance from the technical team of your backup solution provider.